Here's a 5th-level Labyrinth Lord (possible with DCC, too) adventure I ran for my players a few months back. I had a lot of fun putting it together and running it. Aside from the little blurb, I won't post any of the background stuff, starting towns, NPCs, etc. If you like this dungeon, feel free to drop it into any desert area of your world and add or subtract things to taste. I know it's kinda weird to read on the blog, but it's the best I can do. Maps and player handouts are provided at the end of the post.
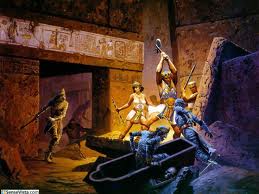
Deep into the desert wastes of Radoom at the world’s edge have explorers recently discovered beneath the sands an ancient tomb. Of the seven discoverers, only one--barely on the cusp of sanity--has returned with information of the tomb’s location. His other companions were either dismembered or driven mad while researching this long-forgotten burial site from an even longer-forgotten desert kingdom. A proclamation has been sent out by scholars and historians to any skilled adventurers willing and able to uncover its secrets. Surely, their names and exploits will be added to the tomes of history, and any riches found within will serve as payment for their travails.
Room 1 : “This large room, constructed entirely of blood-red stone, is illuminated by the natural light seeping in through the entrance and various small holes and cracks in the arched ceiling some 25’ overhead. Surrounding the room’s interior are 26 eight-foot-tall jade statues of menacing cobras, each facing the room’s center. Along the farthest eastern wall lies a set of corroding brass double-doors engraved in hieroglyphics.” (DC 20 Intelligence check: “Beware all who seek to plunder and desecrate the resting place of Pharaoh Ziyad Nhukruma. May your death by Akusa be slow and painful!) There is are archways leading into a room past the north and south walls. (If anyone comes within 10’ of the three cobra statues in front of either archway, the serpents’ eyes begin to glow bright red--but nothing will happen! This is merely a warning to frighten off would-be tomb plunderers.) There is a rolled up piece of well-preserved papyrus on the floor near the center of the room. This is a map for the players. Note that the secret rooms, doors, etc. are not on this map.
Room 2: The brass double-doors pull open with a loud creak that echoes throughout the entrance chamber. Littered along the floor of the 40’ hallway ahead are mounds and mounds of serpent bones and skulls. Adorned along both walls are painted murals, chipped and faded from time, of robed men with the head of either a raven, lizard, jackal, bull, serpent, or fox. (If the bones are removed, taking about 10 minutes, the floor of the hallway is revealed: a mosaic of tiles that depict odd geometric shapes and patterns. Anyone who spends more than two rounds examining the floor will see the geometric pattern begin to move. If they continue to watch, they must Save vs. Spell. * or DC 12 Will Save* Upon failure, an illusion will appear to them that the floor has disappeared to reveal a 15-foot-deep pit filled with angry, hissing black serpents, in which they have unfortunately fallen into. No damage from the fall, but they must immediately make another Save vs Death *or DC 15 Fort save* each round to avoid instant death from these illusionary serpents smothering them to death. Passing either save means they are no longer under the effect of the illusion, and they perceive the floor as normal. It is be possible for another character who has resisted the spell to extend their hand and ‘rescue’ someone still under the illusion. Once ‘rescued’ they are no longer under the illusion’s effect.
Room 3: This medium-sized room is surrounded by 8 menacing minotaur-like stone statues, some of which look to have crumbled to a mere hollowed stump, leaving only shattered stone debris on the floor. There are sets of stone double doors along the north, south, and east walls. The eastern doors have an indentation of three crescent moon shapes. Adventurers will need to find the three crescent-moon keys to unlock the door. *Two of the three can be found in rooms 5 and 23* (the third one was in Room 26, but was already taken by the adventuring duo that will be encountered later near Room 19). If the door is somehow opened without the crescent moon keys (by a thief, for example), 1d6 of the petrified minotaurs will break free of their stone bindings, come to life, and immediately attack anyone within sight. Minotaur - (1d6) [AL C, MV 120’ (40’), AC 13, HD 6, #AT 2 or 1 (gore and bite, or weapon), DMG 1d6/1d6 or weapon, SV F6, ML 12, XP 820, LL 88, HC XXII] Total XP: 4920. HP: 18, 2 x 24, 25, 27, 28. There is a piece of parchment adorned with odd symbols waxed onto the southern door. These are exploding runes placed by the mage Bernardus from the other adventuring party currently exploring the tomb as well. If read, they inflict 6d4 +6 damage to the reader (no save) and ½ damage to anyone within 10’ (Save vs. Spell). A 5th level magic user has a 25% chance to detect the rune’s nature, and a thief has a flat 5% chance to do so.
Room 4: Along the walls of this large room are the faded remains of a painted mural that appear to be of people in mourning. Closer inspection reveals that they seem to be weeping real tears that trickle down the walls. There are puddles both large and small on the stone floor. There is nothing else of note in this room.
Room 5: This room is empty, save for its center, where there is a stone slab being held by two standing and well-preserved corpses. Resting atop the slab is a thin, glowing blue-purple object in the shape of a crescent moon, illuminating the eyeless corpses watching over it. It appears to be quite fragile. There is a 50% chance it will shatter and break if dropped on a hard stone floor. This is one of the three keys needed to open the eastern door in Room 3. If anyone attempts to pick up the key, read the following: Suddenly, the room around you disappears and you seem to be amidst a vast desert, surrounded by sand dunes and a crimson setting sun. Approaching from over one of the nearby dunes is a ghostly figure floating towards you. He is adorned in armor of the ancient desert kingdoms, and his head is that of a fox. He holds no weapons, but in one hand he is holding some sort of curved holy symbol, while the other is extended outward as he draws ever nearer.
Desert Wraith - 1 (1d4) [AL C, MV 120’ (40’) Fly 240’ (80’), AC 16, HD 4, #AT 1 (touch), DMG 1d6 + lose 1d4 STR, DEX or CON (randomly determine; no save), SV F4, ML 12, XP 300, LL 102, HC XVIII] Total XP: 300.HP: 17.**Unaffected by charm, sleep, hold. Can only be hurt by magic weapons, fire, or spells.**
If the wraith is defeated, the party find themselves back in Room 5, and may take the key from the stone slab. There is also now treasure scattered on the floor: Treasure: 9,000 sp; 4,000 gp
Room 6: There is a simple rotting wooden door with several holes in it, revealing the other side of the room. Inside are 3 simple sarcophagi upright against the walls. *The door is still trapped, however. Pendulum Ceiling Blade 1 Atk +10; DMG 2d6. Nothing will happen if the mummified dead are disturbed, but if anyone searches the sarcophagi, they find: Treasure: 900 gp; 4,000 sp; 1x Weapon +1
Room 7: There is a simple rotting wooden door with several holes in it, revealing the other side of the room. Inside are 4 simple sarcophagi upright against the walls. Nothing will happen if the mummified dead are disturbed. There is nothing of value in the room.
Room 8: There is a simple rotting wooden door with several holes in it, revealing the other side of the room. Inside are 2 simple sarcophagi upright against the walls. If anyone enters the room, the mummies will come out of their sarcophagi and attack: Mummy - 2 (1d4) [AL C, MV 60’ (20’), AC 16, HD 5+1, #AT 1, DMG 1d12, Mummy Rot, SV F5, ML 12, XP 860, LL 89, HC XIX] Total XP: 860. HP: 37, 37.**Unaffected by charm, sleep, hold. Can only be hurt by magic weapons, fire, or spells.**
Room 9: There is a simple rotting wooden door with several holes in it, revealing the other side of the room. Inside are 2 simple sarcophagi upright against the walls. If anyone enters the room, two rust monsters will come out from behind sarcophagi they were eating through. Rust Monster - 2 (1d4) [AL N, MV 120’ (40’), AC 18, HD 5, #AT 1, DMG special, SV F3, ML 7, XP 500, LL 93, HC None] Total XP: 1000. HP: 11, 29. TREASURE: GP: 3000, Gems : 3 - Total Value: 925 gp., Jewelry: 1 items - Total Value: 40 gp.
Room 10: There is a set of stone double-doors. When you open the room, before you is a strange sight: two ghostly warriors are in the middle of a fierce battle as they swing with their spears and parry with their shields. They make no sound, but a coldness permeates the air. Pottery and ornamental decorations are scattered throughout the room, and on the western wall is a large, round mirror. If the ghosts are disturbed, they will fight the provoker. Otherwise, they continue their battle they are doomed to repeat for eternity. If the mirror is taken off the wall, they will see it reveals a small hidden door. Ghasts - 2 (1d6) [AL CE, MV 150’ (50’), AC 15, HD 4, #AT 3 (2 claws, bite), DMG 1d4/1d4/1d8, SV F4, ML 9, XP 190, AEC 127, HC VIII, IX, XI, XXI] Total XP: 570.HP: 15, 22
*Secret* Room 11: This thin, secret hallway extends for about 60’ before you reach a door on the other end. There is nothing else of note in this room.
*Secret* Room 12: This is a plain room, save for several skulls arranged in a circle on the floor. The headless skeletons in Room 13 will serve anyone who places these skulls back on them.
Room 13: When you open the stone double doors, inside this plain room are six headless skeletons. Some are wandering around aimlessly, while others are scratching at the eastern wall. They want their heads back that are in Room 12. There is nothing else of note in the room. They can be easily killed, and do not fight back. If they are destroyed, their heads found in Room 12 can no longer be attached to them.
Room 14: There are four more statues of jade cobras in this room. In the center is a simple raised stone slab. Seemingly out of nowhere, a whispered voice speaks: “I may turn men blind or help them see; make cities strong, or make them weak.” *sand* is the answer. If sand is placed on the stone slab, the doors leading to room 13 will open. If anyone tries to open these doors, jets of flame shoot out of the cobras’ mouths. Save vs. Breath for half damage. Cobra Statue Flames (4x) 1 Atk +10; DMG 1d10.
Room 15: This hallway looks to be in pristine condition, and the walls appear to be made of solid gold. There are doors along the walls that are made from what can only be described as pitch-black shadow. (The double doors at the end of the hallway are also made of gold.) Anyone attempting to mine the gold will be in for a rude awakening; hard contact against the gold walls creates a gong-like sound which summons a flesh golem in 1d4 rounds. Golem, Flesh - 1 (1) [AL N, MV 90’ (30’), AC 10, HD 9, #AT 2 (fists), DMG 2d8/2d8, SV F9, ML 12, XP 2,400, AEC 127, HC None] HP: 53. The shadow doors are harmless but cannot be seen through, even by characters with torches or darkvision. An icy coldness comes over anyone going through these doors. Any attacks made in darkness suffer a blindness penalty of -4, and spells may not be cast on anything that cannot be seen by the spellcaster.
Room 15a: You walk through the dark shadow and the room is just as dark. You feel relief come over you as your fatigue and aching muscles seem to subside. Anyone who steps in this room one time will be given full HP and restored any lost attribute points. However, if any character enters the room again, they will feel a slight sickness. If they stay in the room longer than two rounds, they will lose 1d6 HP each round and 1 level each turn (10 rounds) they stay in the room. If they search for secret doors along the western wall, they can find the door leading into Room 22.
Room 16: You walk through the dark shadow and the room is just as dark. There is nothing of note in this room.
Room 17: You walk through the dark shadow and the room is just as dark. Anyone feeling around the south wall will feel a knob to a doorway leading to the secret Room 18
*Secret* Room 18: You enter this room which is lit by magical torches of green flame. Hanging on the south wall is a piece of well-preserved papyrus with the images of ancient desert gods standing from left to right *Give Handout #1 to the players* Remember, hieroglyphics are read from right to left! This is the correct order that the golden disks with similar images must be placed on the door leading into room 43. If the disks are not placed in this order, the medusas will come to life and attack!
Room 19: As you walk by/towards the dark shadow entrance to this room, you overhear voices inside: “The treasure will be all ours if we could just find the other blasted keys... Wait! Did you hear something? Hello?” There is an adventuring duo who has found one of the crescent moons. They will be unwilling at first to join forces unless a spectacular Charisma roll is made. Regardless, they will try to backstab the party once all the crescent moon keys have been found. If driven to fight, Bernardus will cast sleep, then 3 magic missles at the biggest threats, and then cast mirror image on himself, while Muskoa hopefully defeats everyone else with her bastard sword.
“Bernardus”: Lawful Male Magic-user, Lvl: 5,
Attributes: STR 9/ DEX 11/CON 8/INT 17/WIS 13/ CHA 13 ,AC: 10, HP: 18
Equipment: No Armor, Dagger,
Personality: Garrulous, Sly
Spellbook: First (2): Read Languages, Magic Aura, Magic Missle (3 at a time 1d6+1 DMG), Dancing Lights, Jump, Sleep. Second (2): Strength, False Gold, Mirror Image. Third (1):Explosive Runes
“Musoka”: Lawful Female Dwarf, Lvl: 5,
Attributes: STR 18/DEX 12/CON 18/INT 13/WIS 10/ CHA 9 , AC: 17, HP: 26
Equipment: Plate Mail, Club, Bastard Sword +2 (1d10+2)
Personality: Philosophical,Stubborn, Sober
Treasure: CP: 14,000, EP: 1000, Gems : 35 - Total Value: 7940 gp., Magic: Potion of Clairaudience, Scroll: Spells (2) - [Cleric] Dispel Magic, Feign Death; Scroll: Spells (1) - [Magic-user] Stone to Flesh;
Room 20: You walk through the dark shadow and the room is just as dark. Anyone feeling around the southwestern most wall will feel a knob to a doorway leading to the secret hallway Room 25
Room 21: Beyond these golden double-doors lies a large room. Stone steps ascend up to an enormous golden and turquoise sphinx statue. Only if the adventurers have solved the riddles from rooms 14 and 27, should you read the following: You hear a familiar whispered voice: “Haha, adventurers. You have made it this far. What is it you wish to know?” The sphinx will answer any 3 questions asked to it. If the adventurers did not solve both riddles, the sphinx statue does nothing. There is nothing else of interest in this room.
Room 22: This room looks as if it suffered an earthquake. The blood-red stone walls are cracked, and stone sarcophagi lie fallen over with crumbled or open lids. Three mummies rise from their resting places and head in your direction. Their foul stench and appearance make you feel sick to your stomach. Save vs. Poison *each round until passed* or suffer -2 to attack, and cannot cast spells due to retching from the overwhelming stench of the mummies. Mummy - 3 (1d4) [AL C, MV 60’ (20’), AC 16, HD 5+1, #AT 1, DMG 1d12, disease, SV F5, ML 12, XP 860, LL 89, HC XIX] Total XP: 860. HP: 37, 27, 19 **Unaffected by charm, sleep, hold. Can only be hurt by magic weapons, fire, or spells.**
*Secret* Room 23: This room is empty save for its center, where there is a stone slab being held by two standing and well-preserved corpses. Resting atop the slab is a thin, glowing red-orange object in the shape of a crescent moon, illuminating the eyeless corpses watching over it. You’re not quite sure why, but it also appears to be quite fragile and easily shattered. There is a 50% chance it will shatter and break if dropped on a hard stone floor. This is one of the two keys needed to open the eastern door in Room 3. If anyone attempts to pick up the key, read the following:
*Secret* Room 24: The walls of this room are decorated with fading murals of a bloody battle. Fierce warriors with conical helms, sharp spears, and curved scimitars seem to be slaughtering their helpless foes. Three crystalline statues of a similar appearance are in the center of the room, each posed in an aggressive stance. There is a door to the north wall. If anyone tries to open the door to Room 23, the statues come to life and attack! Crystal Statues - 4 (1d6) [AL L, MV 90’ (30’), AC 15, HD 3, #AT 2, DMG 1d6/1d6, SV F3, ML 11, XP 65, LL 98, HC none] Total XP: 195. HP: 13, 14, 13, 14
*Secret* Room 25: This thin, secret hallway extends for about 25’ before you see a door on the other end. There is a 20’ spiked pit trap right before the door. Poison Pit Trap: 2d6 falling damage. Save vs Poison or take 1 STR, DEX, INT, or CON (roll 1d4) damage each round until healed i.e. Cure Disease.
Room 26: This room is empty save for its center, where there is a stone slab being held by two standing and well-preserved corpses. One of the three crescent moon keys needed to open the eastern door in Room 3 was taken by another adventuring duo. They will be encountered near Room 19. The treasure that was in this room was also taken by the duo.
Room 27: There are four cracked and worn stone statues of cloaked maidens. Suddenly, down from the shadows above, two large, black beetles, each the size of a camel descend the walls towards you! Beetle, Giant Boring - 2 (3d6) [AL N, MV 60’ (20’), AC 16, HD 5, #AT 1 (bite), DMG 5d4, SV F5, ML 7, XP 200, AEC 107, *no treasure* Total XP: 400. HP: 21, 26. You hear, after the battle, a whispered voices emanating from the room: “Of no use to one, yet bliss for two. The small boy gets it for nothing, while the young man for it must lie, and the old man for it must buy.” *a kiss* is the answer. (If each of the statues are kissed, then the doors leading into room 26 will open. If anyone attempts to open the doors before solving the riddle, a stone wall drops where they entered from, and gas begins to seep from the four statues. Save vs. Poison or die. The trap door will open again in 1d6 hours.)
Room 28: After placing the three crescent moon keys into the door, it shifts upward revealing a long hallway that opens up to the north and south, and extends about 80’ to a set of large, golden double-doors. This ostentatious set of doors contains 12 indentations, each of an image of an ancient god of the desert kingdoms. Halfway down the hallway, you see a total of six stone statues of women, flanked three on each side. (Closer inspection reveals their wild hair to be that of serpents.) Each of the 12 smaller rooms in this area contain one of the golden discs needed to open the golden double-doors leading into room 43. If the players found the parchment of 12 kings in Room 18, hopefully they will conclude that must be the order they must place the golden discs into the golden double-doors. If they are not placed from right to left, the stone medusas come to life and attack! Medusas - (6) [AL C, MV 90’ (30’), AC 11, HD 4, #AT 1 (Snake bite), DMG 1d6 or Special *save vs. petrify or turn to stone* SV F4, ML 8, XP 245, LL 87, *no treasure* Total XP: 1470. HP: 12, 12, 14, 18, 19, 17.
Room 29 : You see six stone doors in this room. At once maybe there were elaborately carved images on them, but they have since eroded and crumbled. They don’t look like they open as a traditional door but smashing them should not prove challenging. These weak stone doors are easily crushed on the ‘to Hit’ roll of a 10. Anything less means a curse will befall the attacker. Save vs. Spells. *DC 12 Will Save* Failure = roll 1d6: 1= character ages 10 years, 2= Object used to crush the door is destroyed, 3 = lose 1d4 STR, 4=lose 1d4 DEX, 5=lose 1d4 CON, 6= nothing happens.
Room 30 See stone door description in Room 29 in case this door is not broken down. On a stone slab, you see a golden medallion with a carving of bearded man wearing a conical hat, and his arms crossed. (Right to left 2nd king on the parchment--Handout #1)
Room 31 See stone door description in Room 29 in case this door is not broken down. On a stone slab, you see a golden medallion with a carving of bird-headed man wearing a conical hat. (Right to left 12th king on the parchment--Handout #1)
Room 32 See stone door description in Room 29 in case this door is not broken down. On a stone slab, you see a golden medallion with a carving of a short, bull-headed man. (Right to left 9th king on the parchment--Handout #1)
Room 33 See stone door description in Room 29 in case this door is not broken down. On a stone slab, you see a golden medallion with a carving of a bird-headed man with a large disc over his head. (Right to left 6th king on the parchment--Handout #1)
Room 34 See stone door description in Room 29 in case this door is not broken down. On a stone slab, you see a golden medallion with a carving of bearded man holding a staff. (Right to left 4th king on the parchment--Handout #1)
Room 35 See stone door description in Room 29 in case this door is not broken down. On a stone slab, you see a golden medallion with a carving of bearded man wearing a double conical hat, and holding a holy symbol in each hand. (Right to left 5th king on the parchment--Handout #1)
Room 36 You see six stone blocks in this room. At once maybe there were elaborately carved images on them, but have since eroded and crumbled. They don’t look like they open as a traditional door, but smashing them should not prove challenging. These weak stone doors are easily crushed on the ‘to Hit’ roll of a 10. Anything less means a curse will befall the attacker. Save vs. Spells. Failure = roll 1d6: 1= character ages 10 years, 2= Object used to crush the door is destroyed, 3 = lose 1d4 STR, 4=lose 1d4 DEX, 5=lose 1d4 CON, 6= nothing happens.
Room 37 See stone door description in Room 36 in case this door is not broken down. On a stone slab, you see a golden medallion with a carving of a jackal-headed man with flat ears. (Right to left 11th king on the parchment--Handout #1)
Room 38 See stone door description in Room 36 in case this door is not broken down. On a stone slab, you see a golden medallion with a carving of lizard-headed man wearing an ornate hat. (Right to left 7th king on the parchment--Handout #1)
Room 39 See stone door description in Room 36 in case this door is not broken down. On a stone slab, you see a golden medallion with a carving of a fox-headed man. (Right to left 3rd king on the parchment--Handout #1)
Room 40 See stone door description in Room 36 in case this door is not broken down. On a stone slab, you see a golden medallion with a carving of a long-haired woman holding a staff. (Right to left 1st king on the parchment--Handout #1)
Room 41 See stone door description in Room 36 in case this door is not broken down. On a stone slab, you see a golden medallion with a carving of a long-haired woman with a large disc over her head. (Right to left 8th king on the parchment--Handout #1)
Room 42 See stone door description in Room 36 in case this door is not broken down. On a stone slab, you see a golden medallion with a carving of long-beaked, bird-headed man with a small disc over his head. (Right to left 10th king on the parchment--Handout #1)
Room 43 If the 12 discs are not placed in the correct order from right to left, the 6 medusas come to life and attack. (see Room 28 for stats). Assuming the discs are placed in the correct order, read the following: It is obvious at first glance that this room is the most important one in the tomb. The walls are made of solid gold, elaborately decorated with gems and jewels of magnificent colours. There are swirling jade and ivory pillars supporting the ceiling 50’ overhead. In the middle of the room you see several pools of clear water, and above them, about 25’ overhead, is a plain stone sarcophagus, hanging and supported by a simple rope. For all the beauty that exists in the room, you can’t help but feel an ominous presence, as if you shouldn’t be here. Let the party explore a bit. If any of the gems or the sarcophagus are tampered with, the player must make a Save vs. Poison. Failure = that body part used turns to clay, cracks, and crumbles to dust. Everything in this room is cursed. Ziyad Nhukruma wanted to make sure that anyone who stole from his resting place, or tampered with his resting corpse, would suffer dire consequences. There is nothing inside the sarcophagus save black mist and a well-preserved, yet horrifying corpse of the nefarious pharaoh. If opened, the black mist escapes. It is up to the LL to determine what this does, if anything at all. Does it curse the opener? Does it create a plague on the surrounding lands? This could lead to further adventures if desired. After some time exploring, read the following: From the shadows above, you hear a slithering and hissing sound. A large, 40-foot-long serpent of dark grey and green scales is winding down the pillar towards you with a menacing look in his eyes, revealing several fangs the size of longswords. This is Akussa, a mythical creature, stolen many centuries ago by Ziyad’s servants and placed in this temple to guard him. Akussa is an evil creature and will attack anything on sight. It has been hundreds of years since he has eaten, and while he does not need food to survive, he will not shy away at the chance.
*There is a secret door on the far eastern wall leading into Room 44*
Akussa - (1) [AL C, MV 150’ (50’),
AC 15, HD 11, HP 44 #AT 2 (snake bite and constrict)
*special* or *lightning attack*
(Snake bite) DMG 2d4
(Constrict) DMG 1d4+1 *constricted characters attack at -2, or can
make a DC 15 STR check to escape*
(Special) on a natural attack roll of a 20, Akussa swallows man-sized
prey whole. A swallowed creature loses ⅙ of its current HP
each round until death at the 6th round. Akussa will digest
his meal in 12 turns, and the victim is totally gone and cannot
be raised from the dead. A creature swallowed can try to cut
its way out of Akussa’s stomach. The AC from inside Akussa
is AC 12, but the attacker suffers a cumulative -1 penalty to
hit as it is being digested each round. For example, on the
third round, the attacker would suffer a -3 penalty to hit.
(Lightning Attack) Once every 10 rounds, Akussa can discharge a
20-foot-long stroke of electrical energy for 24 DMG
unless a Save vs. Breath weapon is made. Success
equals half damage.
SV F10, ML 12, XP 5,000, *New Creature*, *no treasure*
Total XP: 5,000.
*Secret* Room 44: Whoever’s tomb this is, this must be where they hid their treasure. You see mounds and mounds of gold, jewels, art, and several items you deem magical. Have players roll on Hoard Class XXII; LL p. 106. *Yes, this is overpowered, so if you are not running this as a one-shot, feel free to adjust the treasure however you wish. Now, how will the players get all the treasure back? Surely it is too heavy for just one trip!